Surang
What I learnt by building my own ngrok
Thanks to knighkun for the idea.
What even is a reverse tunnel?
That’s what I thought when I first heard about it and boy oh boy it took me down a rabbit hole. I learnt about NAT, Hole Punching, TCP Multiplexing, Reverse Proxying internals, Wildcard DNS records, etc.
So here is everything I learnt and how I built my own reverse tunnel.
Why does a reverse tunnel exist?
Imagine you’re developing a webapp for a client and want to show it to them, you have 2 options -
A. Deploy the site
or
B. Give them the code and ask them to run it on their machine.
But why can’t we just give them our public IP and the port the webapp is locally running on?
That doesn’t work because the machine usually has a private IP address and unsolicited inbound connections may not have a forwarding rule.
So what do you do?
You flip the direction of the connection.
Instead of asking the internet to initiate a connection to your laptop, you initiate a connection to a server that is publicly reachable.
You make an outbound connection, which in this case, is the deployed instance of Surang.
What Surang actually consists of
Surang consists of two major components: Server and Client
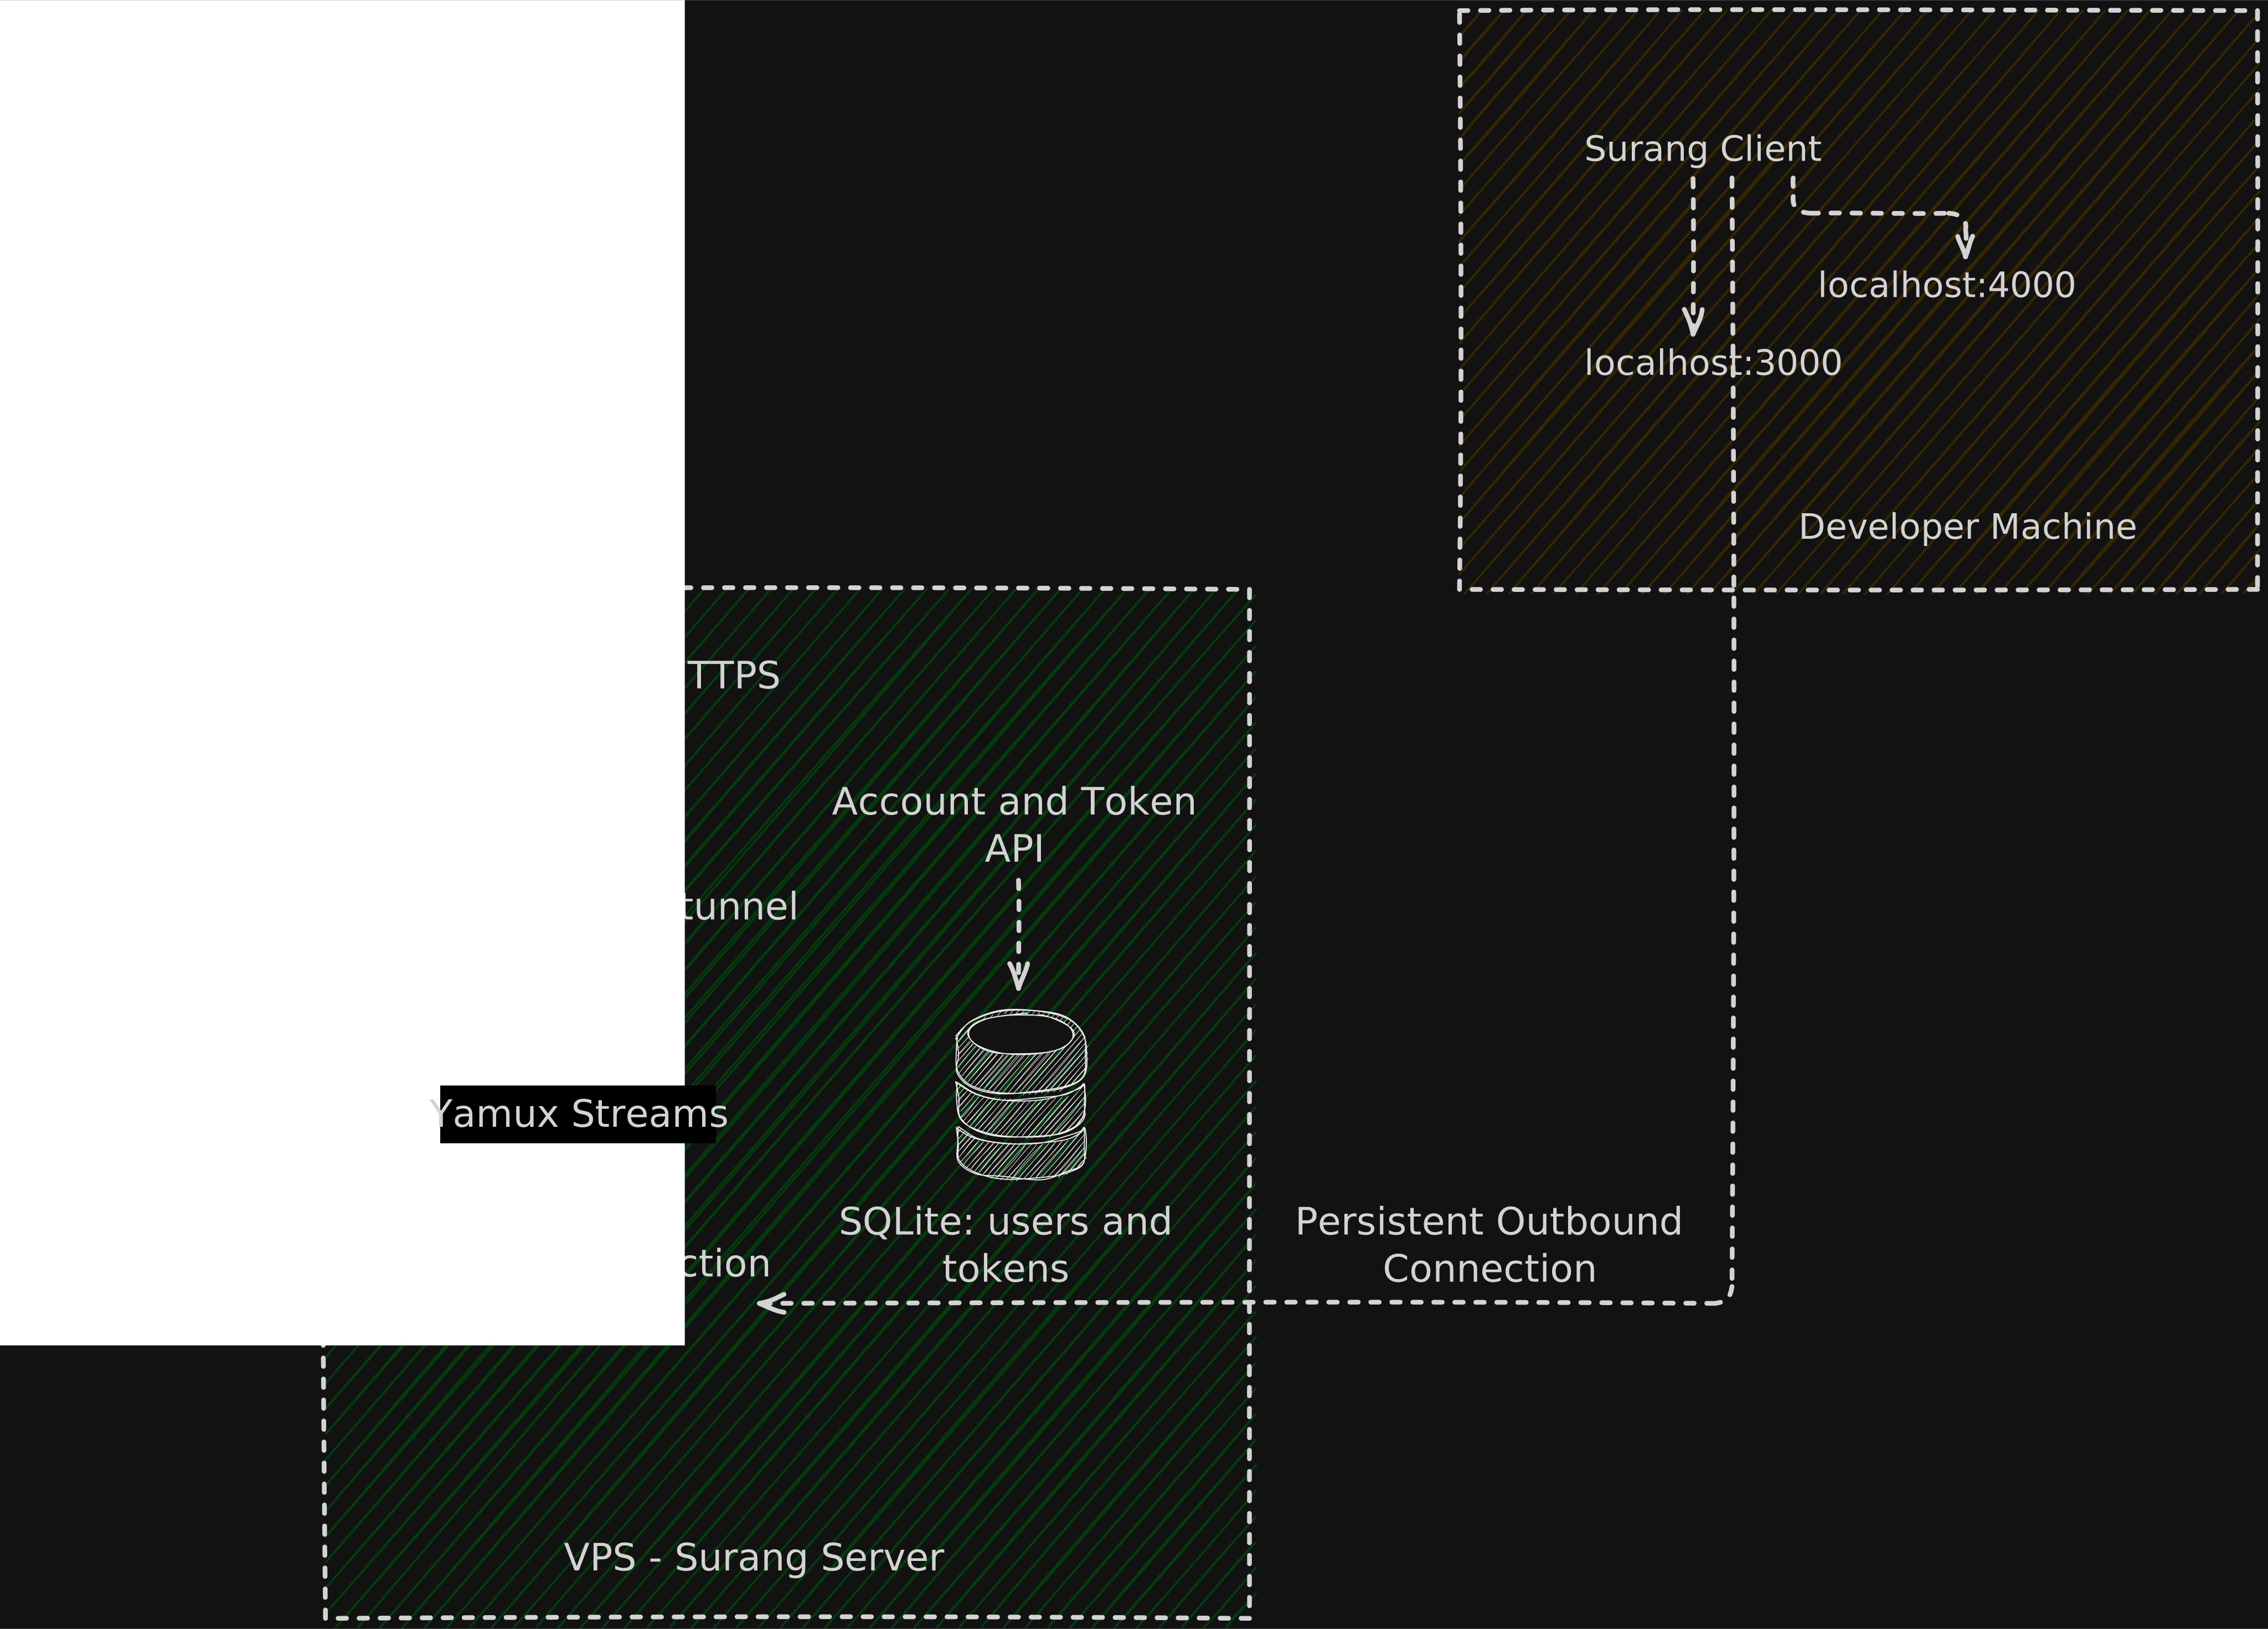
surang-server runs on the VPS. It assigns hostnames to tunnels, receives public traffic and routes it.
surang-client runs on the developer’s machine. It registers tunnels, maintains the connection and forwards traffic to local services.
User accounts and credential data are stored in SQLite so Surang doesn’t need a separate database server. The server can be distributed as a single executable while the SQLite database remains a separate file.
Active tunnel sessions and hostname-to-tunnel mappings are stored in an in-memory registry and are ephemeral in nature.
Why TCP multiplexing
I wanted multiple tunnels to share a persistent TCP connection instead of opening a separate connection for each one.
Why, you may ask?
Well let’s just say TCP connections are thicc. Each connection comes with its own state, buffers and resource overhead. Multiply that across hundreds or thousands of connections and they can quickly eat up the memory on the VPS. Managing them would be a task in itself.
Another problem is TCP itself is a byte stream and not a message-based protocol. It doesn’t preserve message boundaries, so we need a way to determine where one message ends and the next begins. To carry multiple independent streams of traffic over a single connection we also need a way to frame and distinguish those streams.
So I used Yamux. It enabled one TCP connection per client and multiple logical streams per connection.
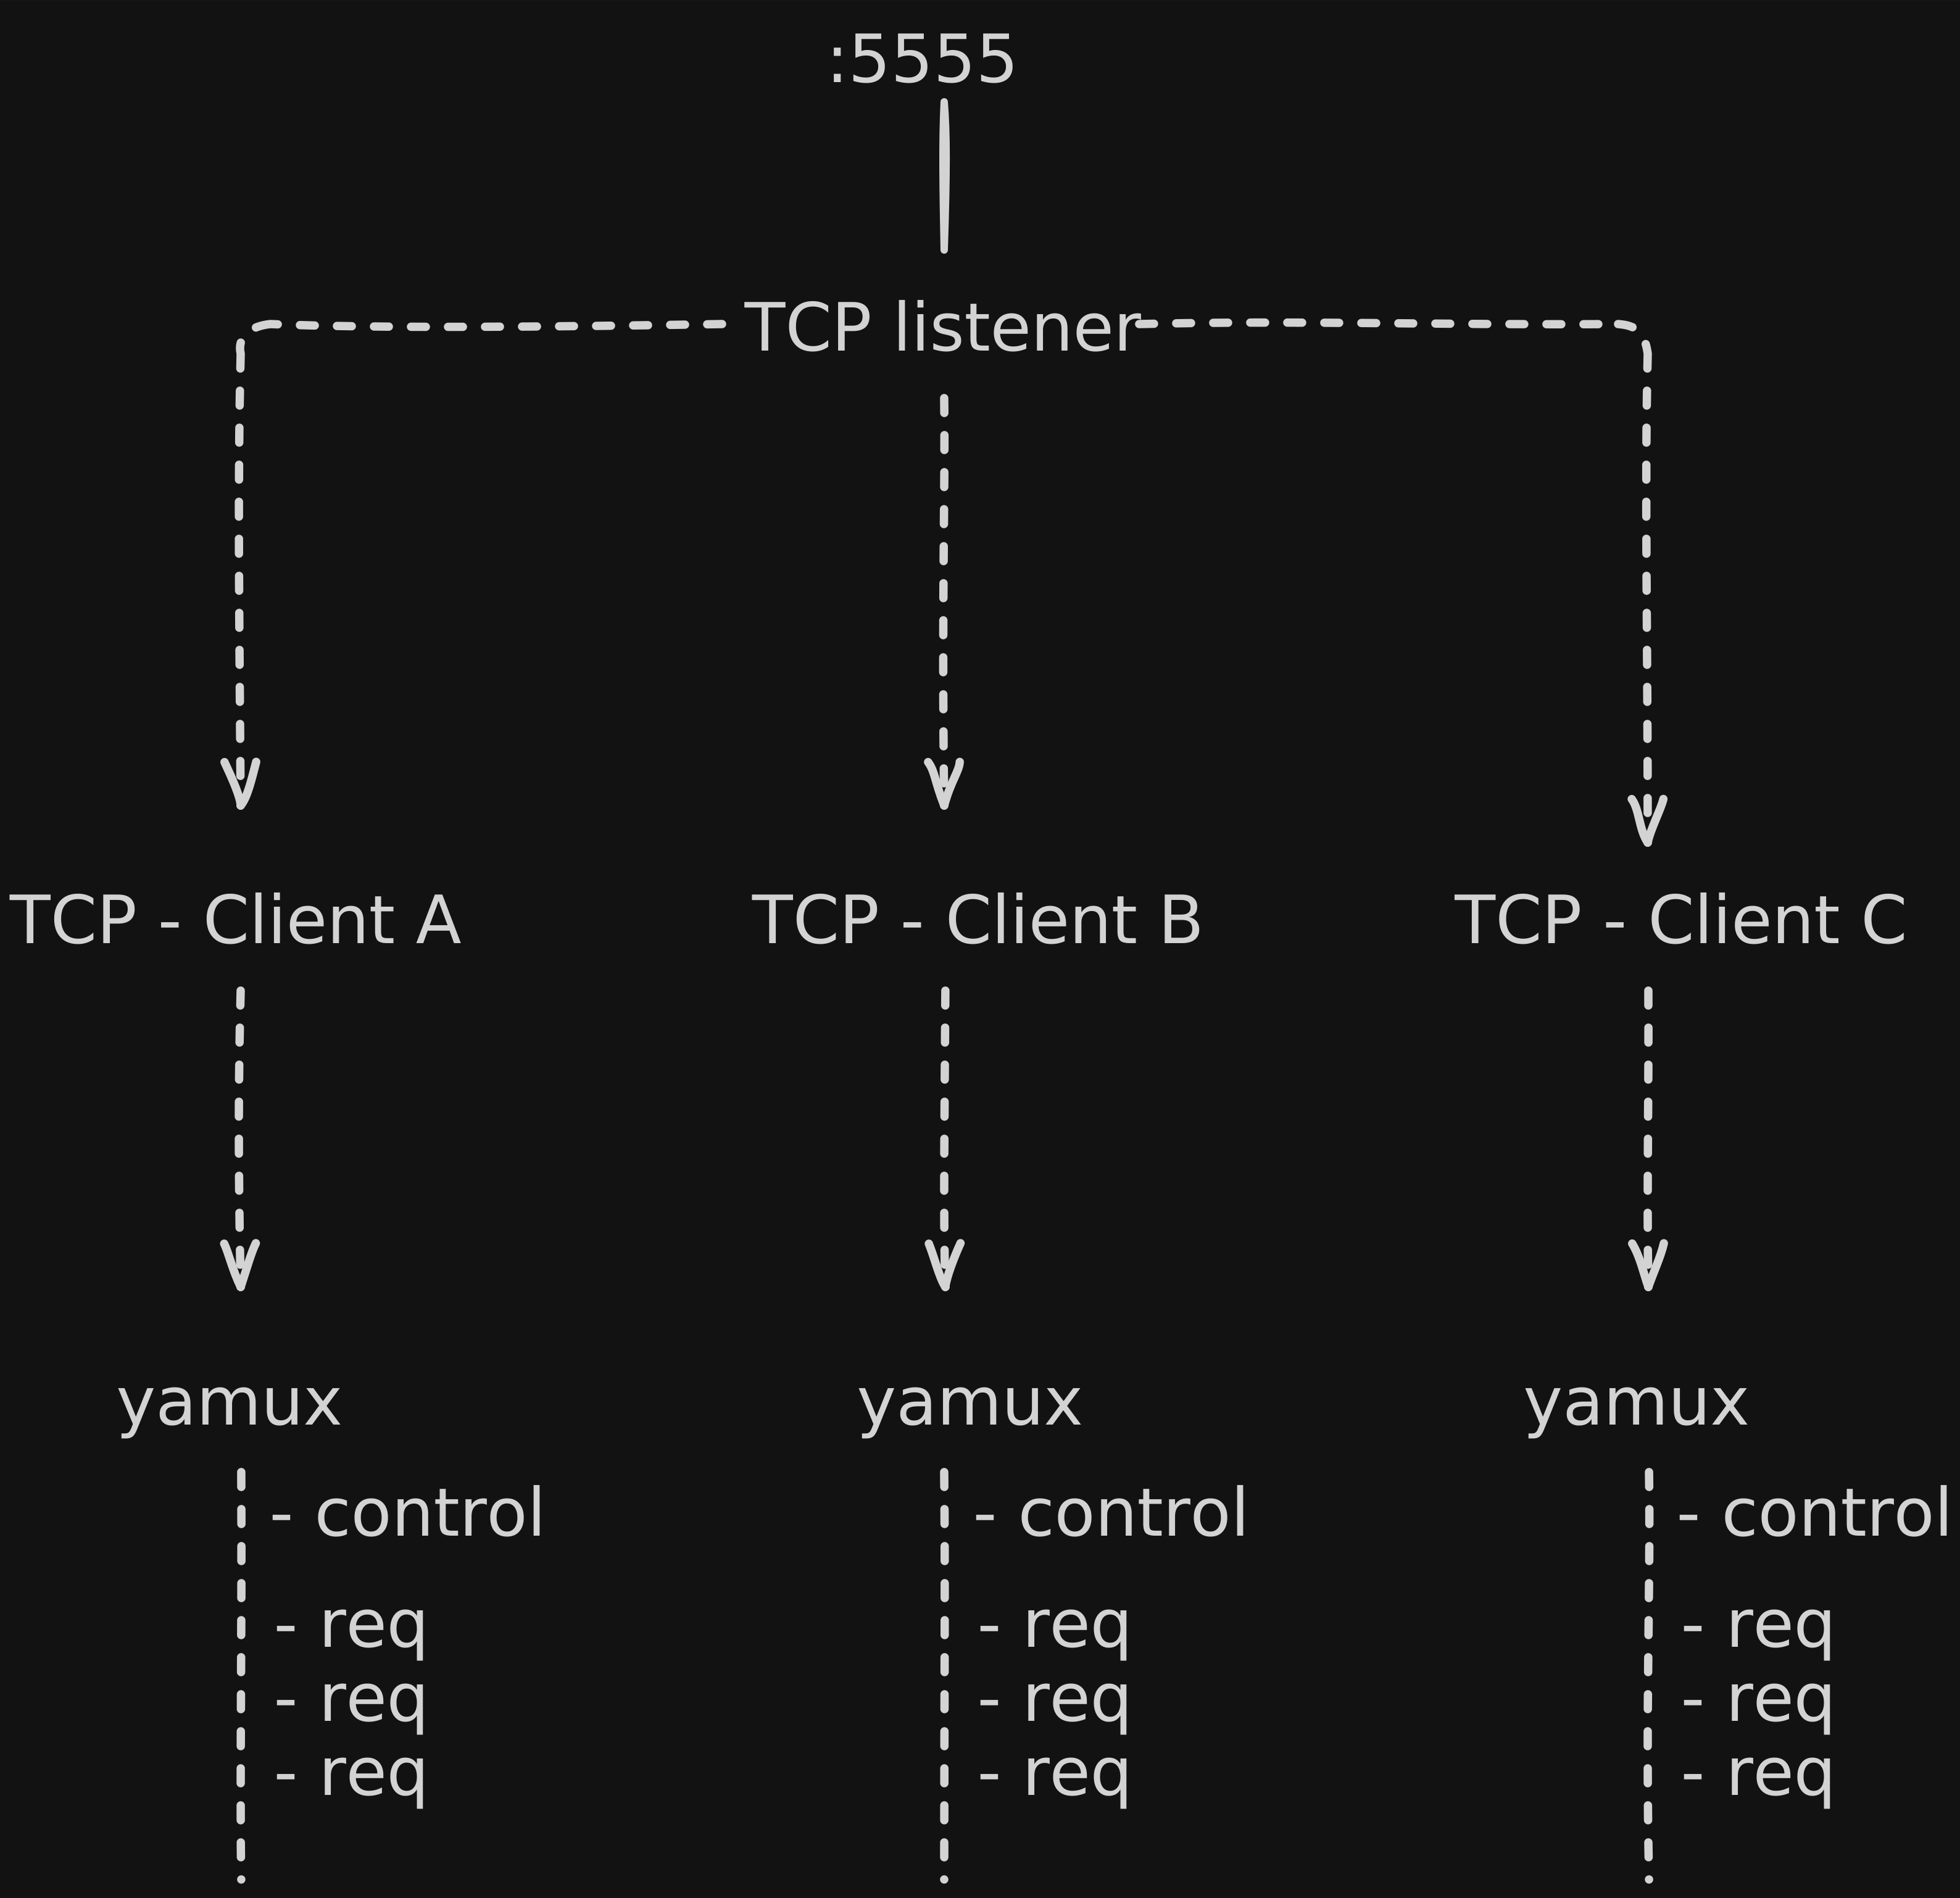
The server listens on port 5555 and accepts incoming TCP connections from Surang clients. Each client establishes one persistent TCP connection over which Yamux session is created.
Because the client initiated the connection, the server can send visitor traffic back through that existing connection without requiring a new inbound connection to the developer’s machine.
This way, Surang reuses the existing connection allowing control messages and concurrent tunnel traffic to share the same transport.
Each Yamux stream has its own stream ID. Yamux also uses protocol flags to manage stream states and lifecycle events.
How surang’s client and server communicate
Yamux transports streams but it doesn’t tell Surang which local application to dial. Surang needs its own application-level protocol on top. This is where registration and dial messages come in. Registration - Tells the server what exists locally Consider the command -
surang-client -tunnel web=localhost:3000The client needs to tell the server that it wants to expose a tunnel labelled web. The local destination localhost:3000 is meaningful to the client but not to the server.
The client sends this JSON registration frame:
{
  "secret":"TOKEN",
  "tunnels":[
    {
      "id": "web",
      "scheme": "http"
    }
  ]
}
We didn’t send the localhost address because the server doesn’t need to dial to it on the client’s behalf. The client does it.
The server responds with an ACK
{
  "results":[
    {
      "id": "web",
      "host": "meow-pilot-live.surang.xyz"
    }
  ]
}
When a visitor’s request arrives, the server opens a new Yamux stream and sends a Dial frame identifying which registered tunnel should handle the request:
{
  "tunnel_id":"web"
}
The client uses this label to look up the corresponding local destination in its configuration. The server doesn’t need to know the local address; it only needs to know which client session and tunnel label to route the request to.
What the request lifecycle looks like
PHASE A - The Client registers and establishes a session.
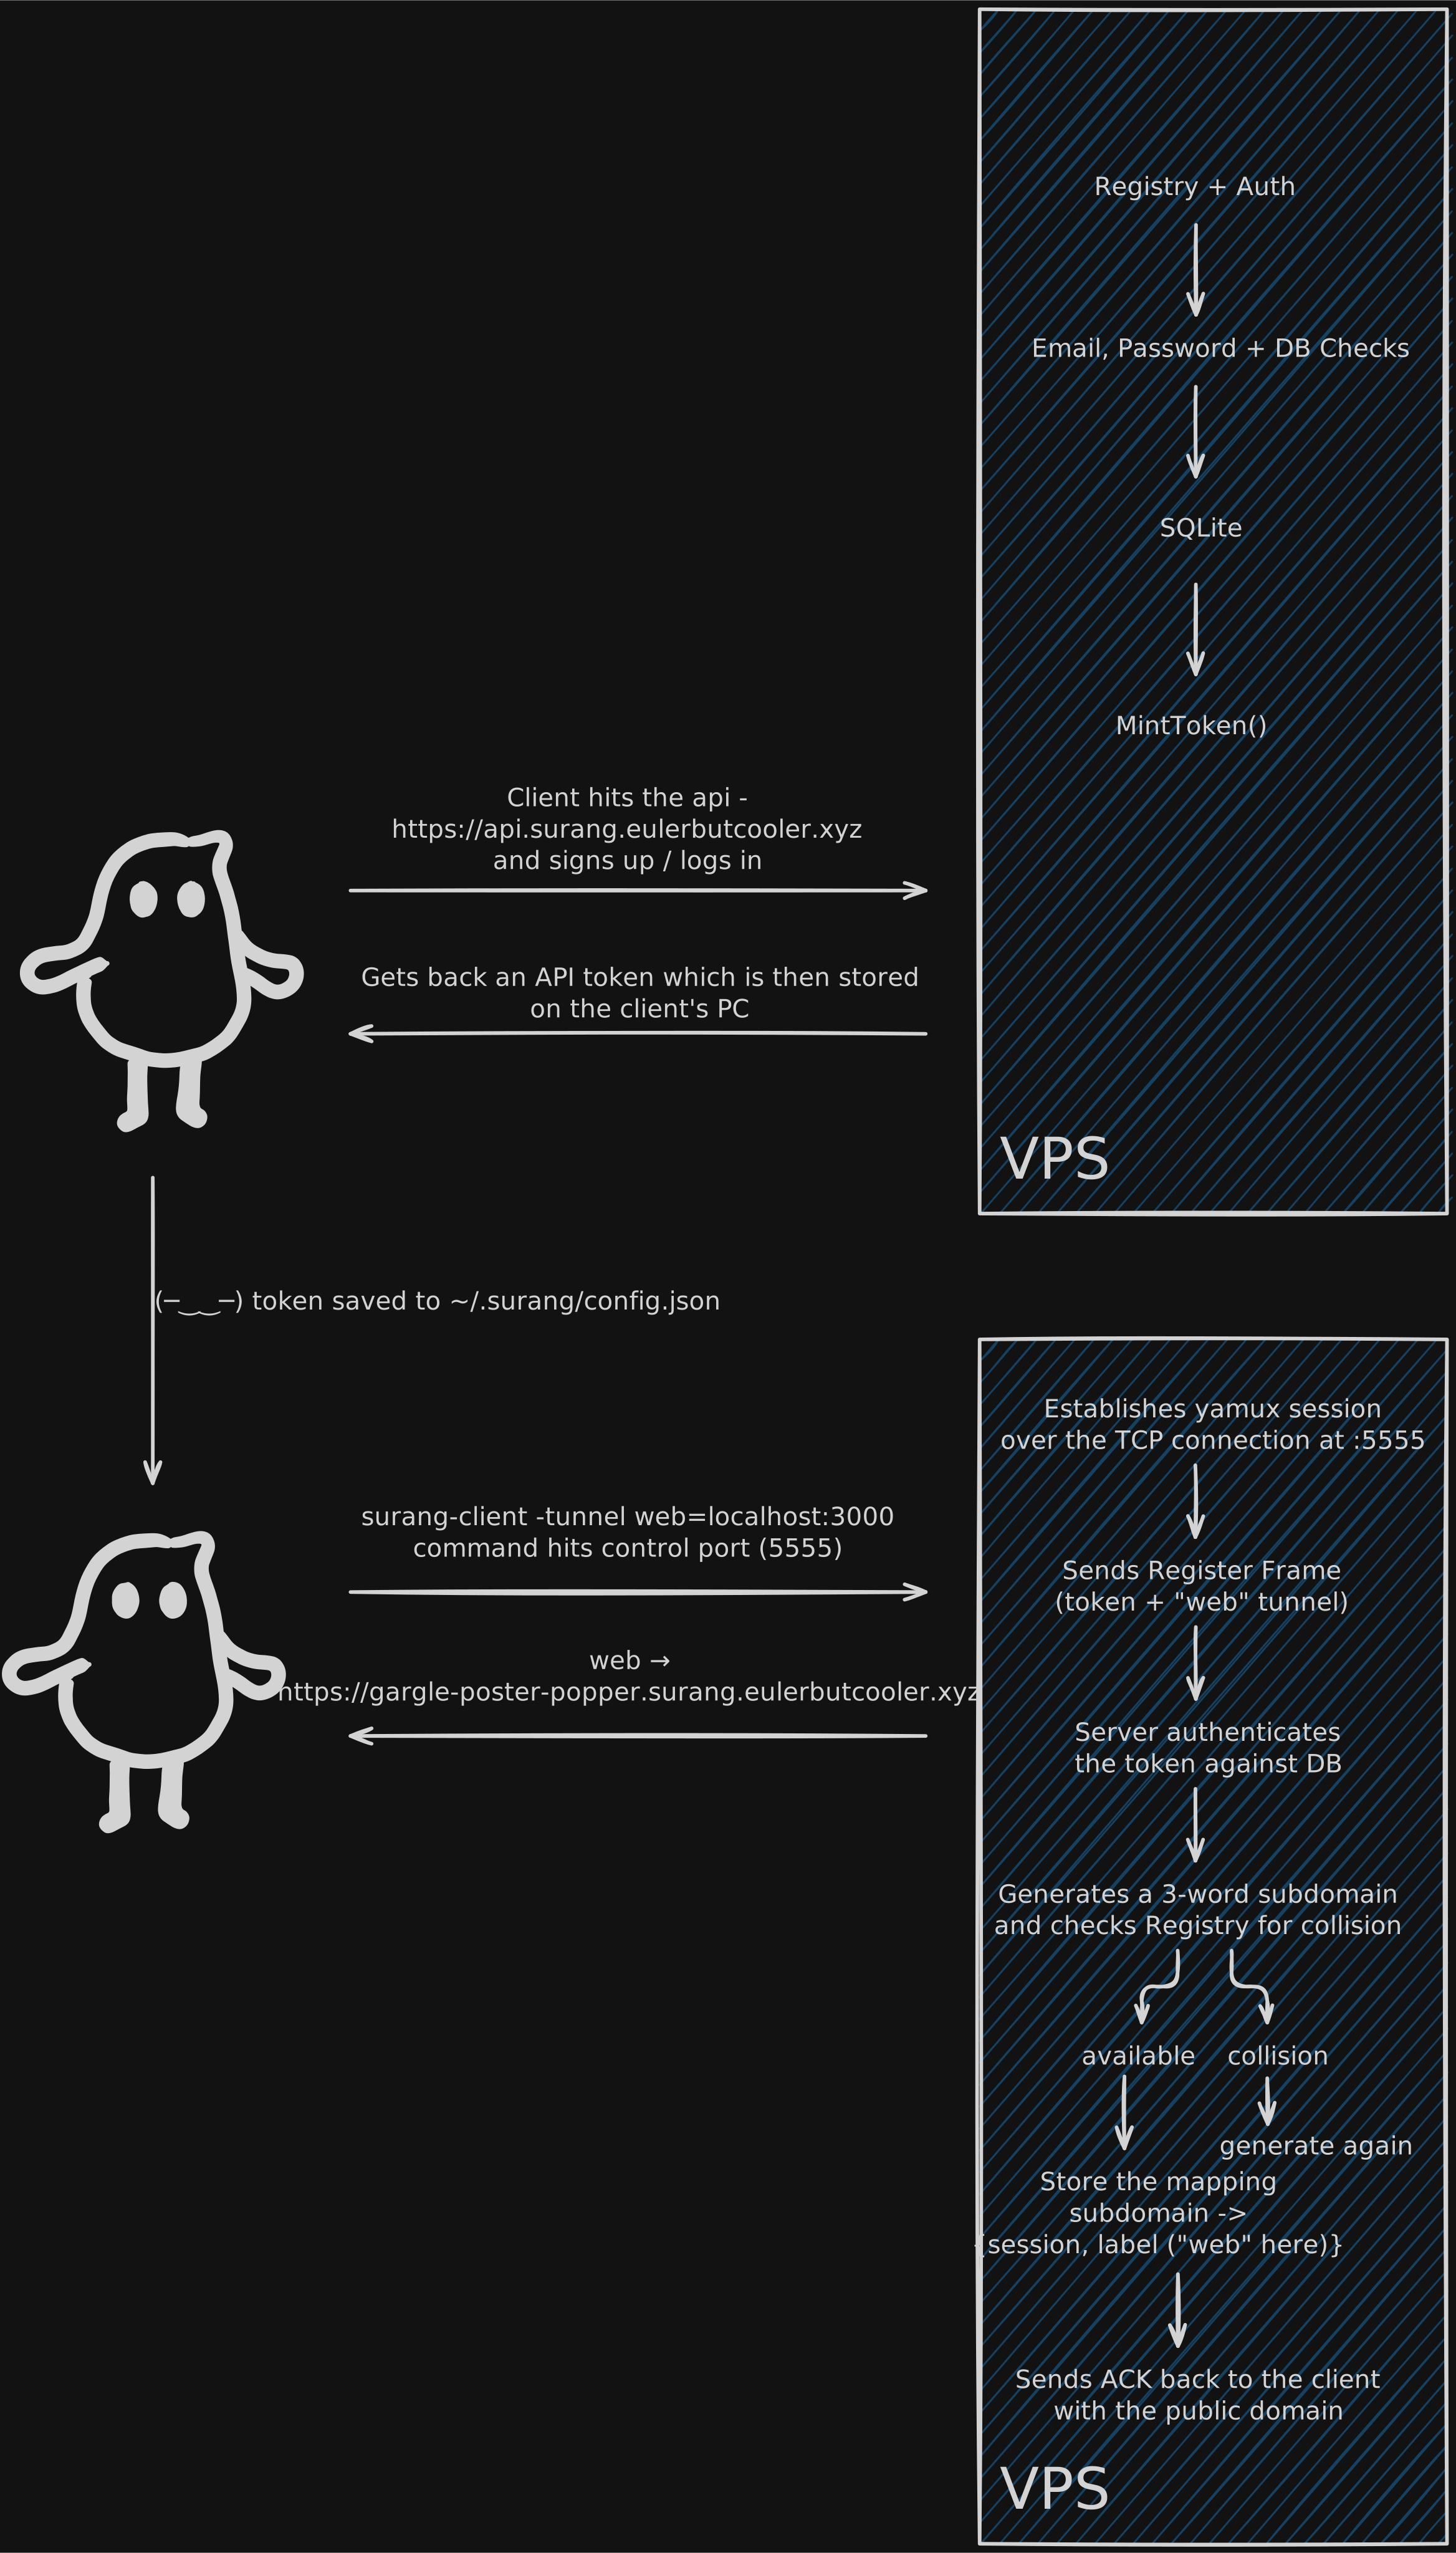
The user creates an account by running this,
surang-client loginwhich opens this menu:
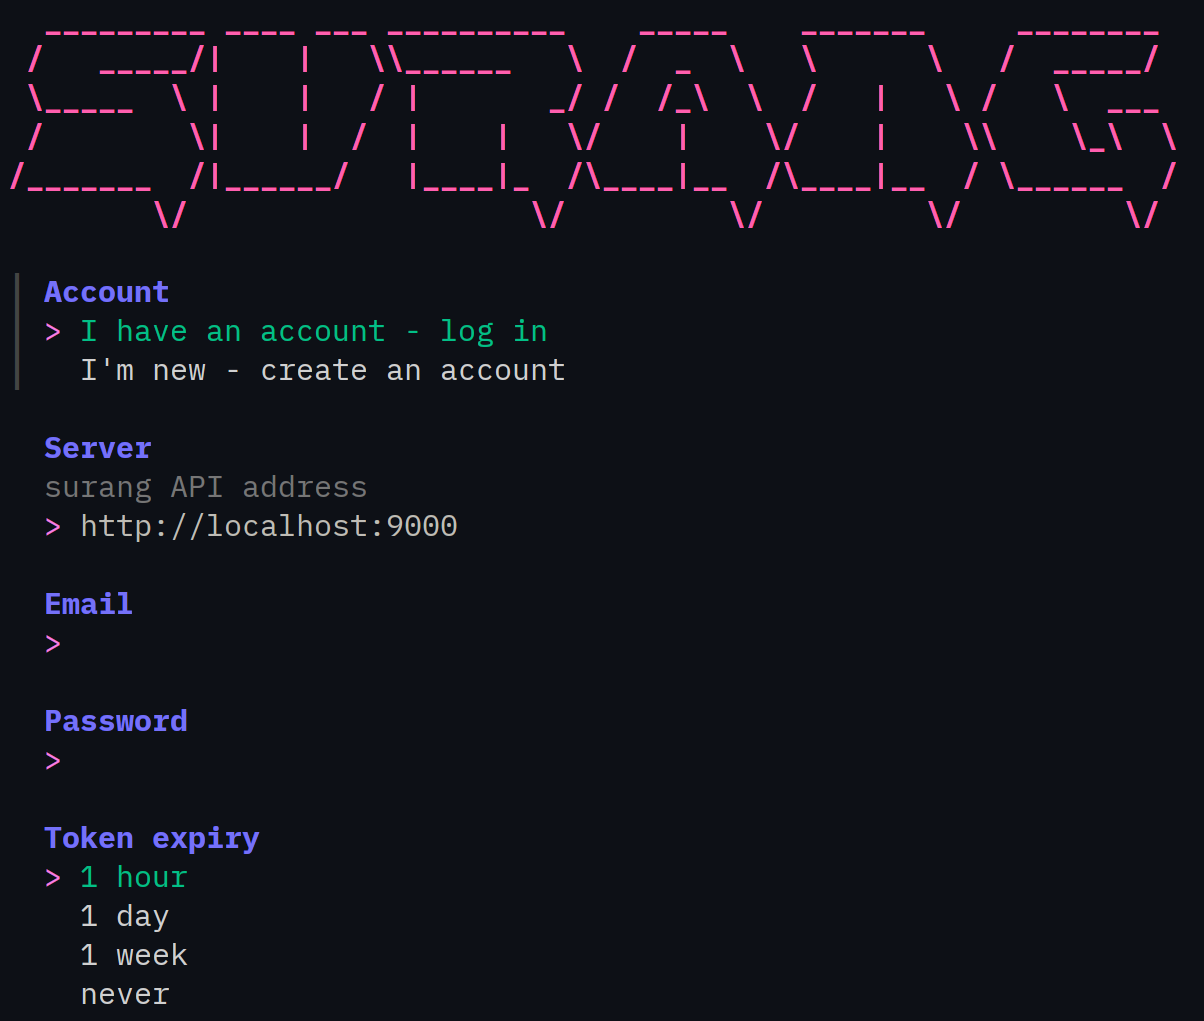
The user enters their details and in the server section they put the API URL of the hosted surang server, which, in our case is https://api.surang.eulerbutcooler.xyz.
This sends a POST request to the API of surang. The server mints a token and the user gets it back. It is then stored on their PC. The token’s expiry can be set to an hour, a day, a week or forever.
The server stores the user’s email and hashed password in SQLite, along with a hash of the issued token for auth. \
The user can then register their tunnels using
surang-client -tunnel web=localhost:3000 srv=localhost:4000This command hits the port 5555 on the server. The client establishes a persistent outbound TCP connection to the server. \
- This client sends a Register Frame which has the token and services they want to register - “web” and “srv”.
- The server then authenticates the token against the database.
- It then generates a three-word subdomain (like what3word) and checks Registry for collision.
- If the three-word string is available it is stored in the mapping.
- The server sends an ACK back to the client with the URLs for their tunnels.
PHASE B - A visitor makes an HTTP request
- DNS resolves the public hostname to the Surang server’s address.
- The server terminates HTTPS on port 443, extracts the subdomain from the request’s Host header.
- The server looks up the subdomain in the active registry to find the client’s Yamux session and tunnel label
- The server opens a Yamux stream and sends a Dial frame identifying the target tunnel.
- The client maps the tunnel label web to its configured local address and forwards the HTTP request to that service.
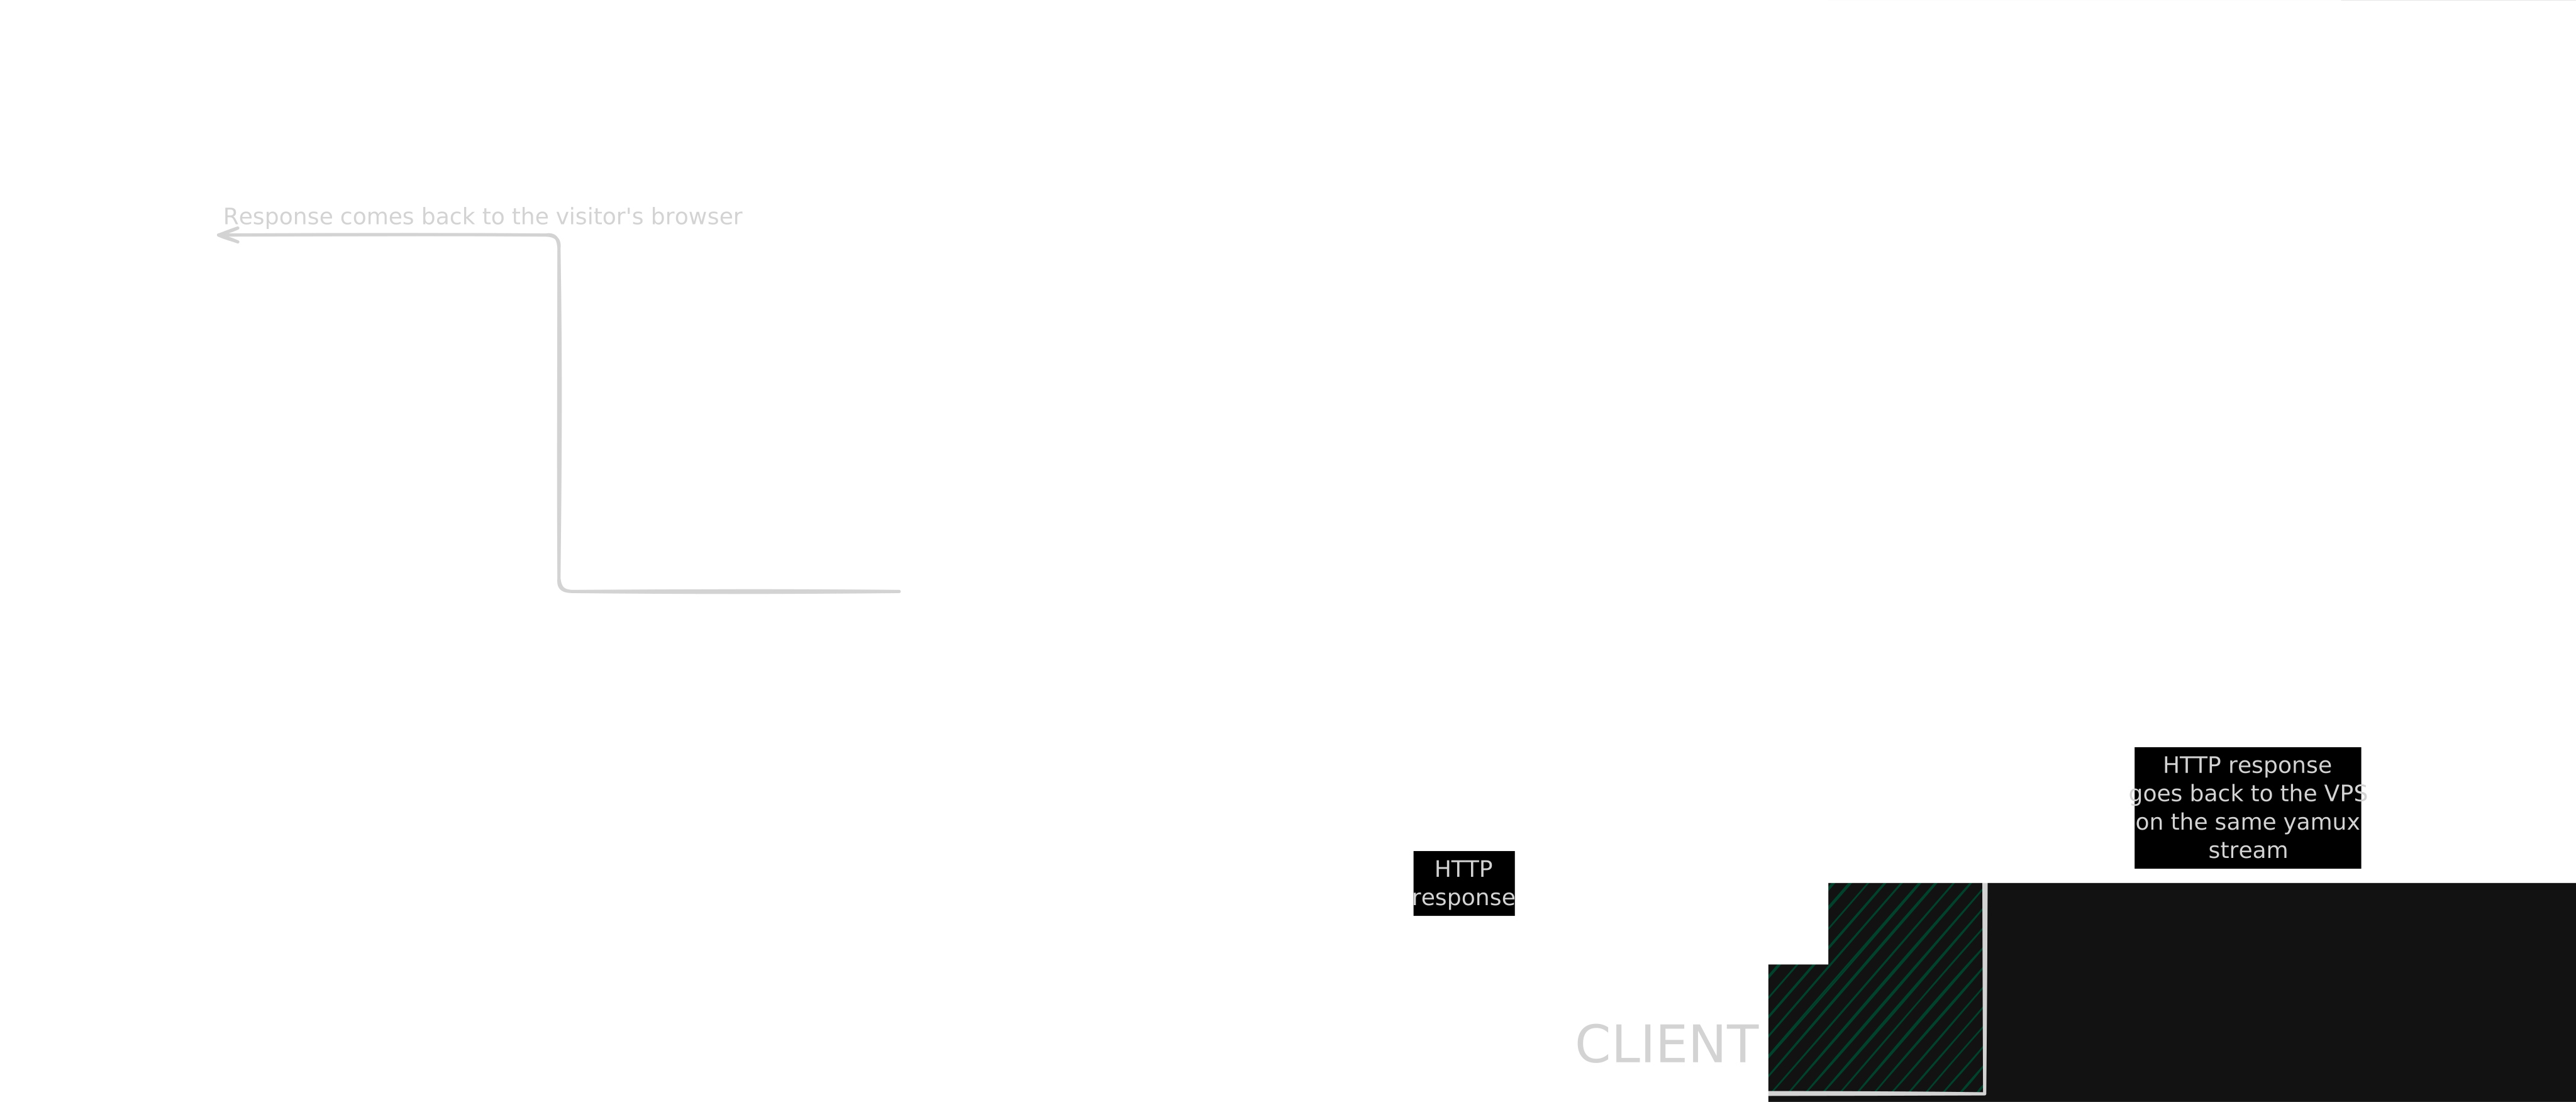
- The local service’s response travels back through that same stream and is returned to the visitor.
Design Decisions
In-memory registry
The hostnames/URLs are stored in the in-memory registry. I used two maps for mapping them. Map 1: sessions - subdomain to binding
sessions map[string]Binding
type Binding struct {
	Session *yamux.Session
	Label string
}
This map is for forward lookup and is used to route public traffic.
If two tunnels are registered by the same client, it maps the subdomains to the session and the label.
Example:
sessions["meow-pilot-wow"] = Binding{
    Session: sessionA,
    Label:   "web",
}

sessions["new-vigil-blunt"] = Binding{
    Session: sessionA,
    Label:   "srv",
}
Map 2: tunnels - session to its subdomain
tunnels map[*yamux.Session][]stringThis map is for the reverse lookup and is used primarily for cleanup.
The Key is the client’s *yamux.Session (a pointer to the yamux session) and Value is a list of every subdomain registered by that session.
Example:
tunnels[sessionA]=[]string{
	"meow-pilot-wow",
	"new-vigil-blunt",
}
When sessionA disconnects, Surang can retrieve all of its subdomains instead of searching through every entry in sessions (map 1)
Unregister() function then deletes each subdomain from map 1 and removes the session from map 2
Both maps are protected by a shared RWMutex (read-write mutex) and are updated together during registration and cleanup. \
HTTP proxying
I used Go’s httputil.ReverseProxy with a custom RoundTripper called tunnelTransport
The standard reverse proxy handles the HTTP request and response mechanics, while my custom transport changes how requests reach the backend. Instead of making a regular network request to the destination, tunnelTransport opens a Yamux stream to the appropriate client and sends a Dial frame identifying the target tunnel.
The selected tunnel binding is attached to the request context, allowing the transport to find the right Yamux session and tunnel label for each request. Once the stream is established, the HTTP request is forwarded through it, and the response is read back from the same stream.
This approach let me reuse Go’s existing HTTP proxy implementation rather than building the entire proxy from scratch.
Why not implement the proxy myself?
I could’ve implemented the HTTP proxying mechanics myself but I already kinda did it in another project of mine - HTTP server from scratch in Go so I skipped it in this one.
Three-word Subdomains
Initially I was fine with subdomains containing numbers and letters but they didn’t feel very human-readable. So I went with three-word subdomains.
The generator uses rejection sampling to implement sampling without replacement. Whenever it picks an index that has already been selected, it rejects it and draws another one.
So you’ll never get a subdomain like meow-meow-meow (sorry)
The hostnames can be re-minted once they are unregistered.
The wordlist contains 1000 unique words and is embedded into the executable binary, so there’s no separate wordlist file to ship or load at runtime.
Wildcard DNS
Since Surang generates subdomains dynamically, creating a separate DNS record for every tunnel wouldn’t be practical. Instead, Surang uses a wildcard DNS record(*.surang.eulerbutcooler.xyz) that points generated subdomains to the server.
This means a hostname like meow-pilot-live.surang.eulerbutcooler.xyz can resolve to the Surang server without needing its own DNS record.
In TLS mode, Surang also uses a wildcard TLS certificate that covers the root domain and its single-level subdomains. So all the subdomains are HTTPS secured.
Checkout Surang here - Surang
Here’s the repo if you want to explore further - Github.
Thanks for reading so far. Let me know how you find this blog.
Ciao!